The Ultimate Diapering Guide: Cloth vs. Disposable & Everything In Between
Navigating the Diapering Journey: Your Definitive Guide to Baby's Bottom Care
Welcome to the wondrous, sometimes messy, but always intimate world of diapering! As new or expectant parents, you're embarking on a journey filled with incredible firsts, and surprisingly, many of them involve what comes out the other end of your little one. It's estimated that a baby will go through between 2,500 and 3,000 diapers in their first year of life alone – a staggering number that translates into countless changes, mountains of wipes, and a symphony of gurgles, grunts, and, yes, a lot of poop.
The sheer volume of choices in the baby aisle can feel overwhelming. Are disposables truly the easiest path, or is cloth the eco-conscious and budget-friendly champion? What about those "in-between" options? And how, exactly, do you perform a diaper change without turning it into a wrestling match or an unexpected modern art splatter?
This comprehensive guide is meticulously crafted by pediatric specialists and experienced parenting educators to be your trusted manual for all things bottom-related. We'll delve into the science, offer practical parent-to-parent wisdom, and equip you with the knowledge to tackle any diapering dilemma with confidence and grace. By the end, you won't just be changing diapers; you'll be nurturing your baby's delicate skin, understanding their health cues, and cherishing these precious moments of connection.

Diaper Genie Signature Pail - Odor Control System
Stop letting your nursery smell like a locker room; this pail uses double-tite clamps to literally lock the 'stink' away. The foot pedal is a total lifesaver for those 3 AM changes when you're essentially a zombie with only one free hand.
Part 1: The Great Debate – Cloth vs. Disposable Diapers
Choosing between cloth and disposable diapers is one of the foundational decisions many parents face. There's no single "right" answer, as both options come with distinct advantages and disadvantages that align differently with various family lifestyles, budgets, and values. Understanding these nuances is key to making an informed choice for your family and your baby's delicate skin.
Disposable Diapers: The Convenience King
For approximately 95% of parents, disposable diapers are the go-to choice, primarily due to their unparalleled convenience.
Pros of Disposable Diapers:
- Ultimate Convenience: This is the undeniable champion. Disposables are designed for a "use it, toss it" mentality. There's no laundry, no messy rinsing, and no carrying around wet, soiled bags. This convenience is particularly valuable for busy parents, during travel, or for overnight changes when speed and simplicity are paramount. The ability to quickly secure and discard a soiled diaper can significantly ease the demands of new parenthood.
- Superior Absorbency: Modern disposable diapers are engineering marvels. They feature super-absorbent polymers (SAPs) – tiny crystals that can absorb up to 300 times their weight in liquid. These SAPs lock moisture away from your baby's skin for extended periods, significantly reducing the risk of diaper rash and providing longer stretches of dry comfort, especially overnight. This advanced absorbency helps maintain a healthy skin barrier by minimizing exposure to moisture and irritants.
- Widespread Availability: You can find disposable diapers virtually anywhere: grocery stores, pharmacies, big-box retailers, gas stations, and even online with rapid delivery. This widespread availability offers peace of mind, ensuring you're rarely caught without a fresh diaper, no matter where you are.
- Leak Protection: Beyond absorbency, disposables often boast advanced leak guards, elasticized leg cuffs, and snug waistbands designed to contain even the most explosive blowouts, protecting clothing and bedding.
Cons of Disposable Diapers:
- Significant Cost: While individual diapers seem inexpensive, the cumulative cost is substantial. Expect to spend upwards of $2,000 to $3,000 per child before they are fully potty trained, depending on brand, size, and purchasing habits. This figure doesn't account for wipes, creams, or diaper pails. Over time, this expense can become a considerable burden on a family budget.
- Environmental Impact: This is the most significant concern for many. Disposable diapers are a major contributor to landfill waste, with each diaper taking an estimated 250 to 500 years to decompose. The sheer volume (millions of diapers discarded daily worldwide) leads to environmental strain, including resource consumption for manufacturing (wood pulp, plastics), energy for production, and methane gas emissions from decomposition in anaerobic landfill conditions.
- Chemical Exposure: While regulations exist, many disposable diapers still contain a variety of chemicals. These can include:
- Fragrances: Added for odor control, but can be skin irritants and allergens.
- Chlorine: Used in the bleaching process of wood pulp, which can produce trace amounts of dioxins – known carcinogens. While levels are low, some parents prefer to avoid them entirely.
- Phthalates: Used to make plastics more flexible, these are endocrine disruptors that some studies link to developmental and reproductive issues.
- Dyes: Can cause skin reactions in sensitive babies. The rise of "clean" and "eco-friendly" disposable brands offers alternatives, often boasting plant-based materials and absence of common irritants, but these typically come at a higher price point.
Cloth Diapers: The Sustainable and Gentle Choice
Forget the image of bulky, stiff squares with sharp safety pins. Modern cloth diapers are sophisticated, user-friendly, and often as sleek as their disposable counterparts, featuring adjustable snaps, waterproof covers, and absorbent inserts.
Pros of Cloth Diapers:
- Long-Term Cost Savings: While the initial investment can feel steep (typically $300-$500 for a full stash), cloth diapers save thousands of dollars over a child's diapering lifetime. The savings multiply exponentially if they are reused for subsequent children, making them a highly economical choice in the long run.
- Eco-Friendly: This is a primary motivator for many cloth diapering families. By choosing reusable options, you significantly reduce landfill waste. While washing cloth diapers consumes water and energy, studies often show a net positive environmental impact compared to the continuous manufacturing and disposal cycle of disposables. Many families also use eco-friendly detergents and energy-efficient washing machines to further minimize their footprint.
- Gentle on Skin: Cloth diapers are predominantly made from natural, breathable fibers like cotton, bamboo, and hemp. These materials are often gentler against a baby's sensitive skin, reducing exposure to the chemicals, fragrances, and dyes found in many disposables. The increased breathability can also help prevent heat rash and maintain a healthier microclimate in the diaper area.
- Potty Training Readiness: Many parents report that children in cloth diapers tend to potty train earlier. The reason is simple: cloth diapers, even with absorbent inserts, allow children to feel the sensation of wetness more readily than super-absorbent disposables. This direct feedback helps them connect the feeling of a full bladder with the act of urination, fostering body awareness crucial for successful potty training.
- Durability and Resale Value: High-quality cloth diapers are built to last through multiple children and often retain significant resale value, further offsetting the initial cost.
Cons of Cloth Diapers:
- Increased Laundry Commitment: This is arguably the biggest hurdle. Cloth diapering means committing to 2-3 extra loads of laundry per week, specifically dedicated to diapers. This involves a precise washing routine (pre-wash, main wash, proper detergent) to ensure cleanliness and absorbency. It requires time, energy, and access to a reliable washing machine.
- Higher Initial Cost: The upfront investment in a full cloth diaper stash can be a shock for some families. While economically sound long-term, gathering covers, inserts, wet bags, and accessories all at once requires a significant initial outlay.
- Daycare Challenges: Not all daycares are equipped or willing to handle cloth diapers. Their policies vary widely, so it's crucial to check with your chosen provider well in advance. Some may require you to provide a designated wet bag for soiled diapers, while others may only accept disposables.
- Bulkier Fit: While modern cloth diapers are trim, some styles can be bulkier than disposables, which might affect clothing fit, especially for smaller babies.
- On-the-Go Logistics: Managing soiled cloth diapers when out and about requires planning – typically involving a wet bag to contain odors and moisture until you return home for washing.
The Hybrid Approach: Best of Both Worlds
Many families find immense success and satisfaction by adopting a hybrid approach. This often means using cloth diapers at home, where laundry facilities are readily available, and opting for the convenience of disposables for travel, overnight, or during periods of illness or particularly busy schedules. This method allows parents to reap the environmental and cost benefits of cloth while leveraging the convenience of disposables when it's most needed, reducing stress and overwhelming demands. It's a highly adaptable and customizable solution that truly embodies a "whatever works best for your family" philosophy.
Part 2: Mastering the Diaper Change – A Step-by-Step Guide
Diaper changing will quickly become one of the most frequent activities in your day. Far from being a chore, it's a golden opportunity for connection, communication, and keeping your baby comfortable and healthy. Mastering the technique ensures both efficiency and hygiene.
The Essential Changing Station Setup
Before you even lay your baby down, preparation is paramount. The cardinal rule of diaper changing is: Never, ever leave a baby unattended on a changing table or elevated surface. Babies can roll surprisingly early and quickly, making falls a significant hazard. Always keep one hand on your baby if you must turn away for a second, or better yet, have everything within arm's reach before the change begins.
A well-organized changing station will streamline the process and minimize stress:
- Clean Diaper: Always have a fresh one unfolded and ready.
- Wipes: Pull out a few wipes in advance to avoid wrestling with the package one-handed. Consider gentle, water-based options like these:
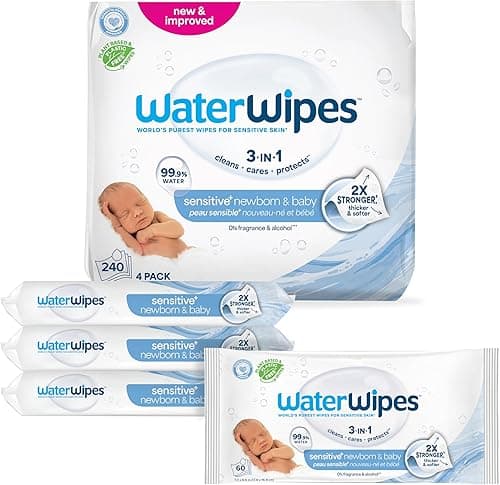
WaterWipes Original Baby Wipes, 99.9% Water, Unscented & Hypoallergenic
Clean those precious rolls with zero drama using the world's purest baby wipes. Featuring just two ingredients, these plant-based wipes are basically a cheat code for avoiding diaper rash while staying eco-friendly. It’s the peace of mind you need for your little one’s sensitive skin, wrapped in a plastic-free package.
WaterWipes Original Baby Wipes are an excellent choice, especially for newborns and babies with sensitive skin, as they are made with 99.9% water and a drop of fruit extract, free from fragrance, alcohol, and harsh chemicals.
3. Diaper Cream: Essential for prevention and treatment of rashes. Have your preferred barrier cream or medicated cream at hand. 4. Change of Clothes: A full outfit (onesie, pants/pajamas) within easy reach is a lifesaver for unexpected blowouts or leaks. 5. Changing Pad and Cover: A waterproof changing pad provides a hygienic surface, and a washable cover makes cleanup easier. 6. Diaper Pail: A designated pail to contain soiled diapers and odors.
Diaper Genie Signature Pail - Odor Control System
Stop letting your nursery smell like a locker room; this pail uses double-tite clamps to literally lock the 'stink' away. The foot pedal is a total lifesaver for those 3 AM changes when you're essentially a zombie with only one free hand.
The Diaper Genie Signature Pail is designed with a multi-layer bag and an air-tight clamp to lock in odors, making it an indispensable part of a fresh-smelling nursery. Its foot pedal operation also allows for hands-free disposal, which is incredibly convenient when you're holding a wiggly baby.
The Diaper Change Process: A Masterclass in Hygiene
- Preparation and Safety First: Lay your baby gently on the changing pad. Ensure all necessary items are within arm's reach. Engage with your baby – sing, talk, make silly faces – to make it a positive, connecting experience.
- Unfasten and Contain: Carefully undo the tabs of the dirty diaper (or snaps/Velcro for cloth). For disposable diapers, fold the dirty tabs back onto themselves to prevent them from sticking to your baby or other surfaces. If there's a significant mess, you can gently use the front portion of the dirty diaper to wipe away the bulk of the poop as you pull it down between your baby's legs.
- Lift, Wipe, and Cleanse Thoroughly:
- Gently lift your baby's legs by the ankles, supporting their hips if they are very young. This elevates their bottom, making it easier to clean.
- Begin wiping from front to back. This is crucial for all babies, but especially for girls, to prevent bacteria from the anal area from entering the urethra and causing urinary tract infections (UTIs).
- Use a fresh part of the wipe (or a new wipe) for each stroke until the area is completely clean. Pay special attention to creases and folds, where moisture and bacteria can hide.
- Parent-to-Parent Tip for Boys: When changing a baby boy, keep a clean cloth or a fresh wipe loosely draped over his "danger zone." Exposure to air can often stimulate them to pee, and this simple barrier can save you from an unexpected shower!
- Pat Dry and Air Time: Once clean, gently pat the area completely dry with a clean wipe or soft cloth. Allowing the skin to air dry for a few moments is highly beneficial. Moisture trapped against the skin, especially in the warm, enclosed environment of a diaper, creates a breeding ground for bacteria and yeast, which are primary causes of diaper rash. This brief "commando" time allows oxygen to reach the skin and helps maintain its natural barrier.
- Apply Barrier Cream (If Needed): If you notice any redness, irritation, or if your baby is prone to rashes, now is the time to apply a generous layer of barrier cream (zinc oxide or petroleum-based). This creates a protective shield between your baby's skin and urine/feces.
- Secure the Fresh Diaper: Slide the clean, open diaper under your baby's bottom, ensuring the back half is positioned under their lower back. For newborns, ensure the top edge of the diaper sits below the umbilical cord stump to allow it to air out and heal properly. Bring the front of the diaper up between their legs. Fasten the tabs snugly but not too tightly. You should be able to fit two fingers comfortably between the waistband and your baby's tummy. Check the leg cuffs to ensure they are flared outwards around the thighs, providing a snug fit to prevent leaks.
- Dispose and Clean Up: Secure the tabs of the dirty diaper to itself, bundle it up, and immediately place it into the diaper pail. Clean your changing station and wash your hands thoroughly.
Expert Tip: Maintaining Connection During Diaper Changes
Diaper changes are frequent, but they don't have to be mundane. Use this time as an opportunity for bonding. Talk to your baby, sing songs, make eye contact, tickle their feet, or play peek-a-boo. This interaction transforms a necessary task into a moment of nurturing and strengthens your parent-child connection.
Part 3: Troubleshooting Poop – A Guide to Baby's Bowel Movements
A baby's stool is a direct window into their digestive health and overall well-being. Understanding the various appearances, textures, and frequencies of baby poop is an essential skill for new parents, helping you differentiate between normal variations and potential red flags.
The First Few Days: Meconium
- Appearance: Black, tarry, and incredibly sticky.
- Context: This is your baby's first stool, composed of materials ingested in the womb, such as amniotic fluid, lanugo (fine fetal hair), and intestinal epithelial cells. It's typically sterile and odorless.
- Parent-to-Parent Tip: The stickiness of meconium can make it challenging to wipe off. Applying a thin layer of petroleum jelly, olive oil, or coconut oil to your baby's bottom before their first few poops can create a barrier that makes subsequent cleanups much easier.
Days 3-5: Transitional Stool
- Appearance: Greenish-brown, less tarry, and looser than meconium.
- Context: This change signifies that your baby is beginning to digest breast milk or formula effectively. It's a healthy indication that their digestive system is activating and clearing out the remnants of their prenatal environment.
Breastfed Baby Poop
- Appearance: Typically mustard yellow, with a seedy or cottage cheese-like texture. It can be quite runny, often mistaken for diarrhea by new parents.
- Odor: Usually mild and sweet-smelling (relatively!), often described as smelling faintly of popcorn or yogurt.
- Frequency: Highly variable, and both ends of the spectrum are normal. Some breastfed babies may poop after every feeding (reflecting the gastrocolic reflex, where feeding stimulates the bowels), while others may go once every 7-10 days. As long as the stool is soft when it does come, and your baby is otherwise thriving (gaining weight, alert, feeding well), both frequencies can be considered normal. This variation is due to the highly digestible nature of breast milk.
Formula-Fed Baby Poop
- Appearance: Tan or brown, with a thicker, paste-like consistency, often compared to peanut butter or hummus.
- Odor: Generally stronger and more pungent than breastfed stool, resembling adult stool more closely.
- Frequency: Typically more consistent, often 1-2 times a day, though variations can occur. The less digestible components of formula lead to more frequent and predictable bowel movements.
Dietary Influences (Older Babies and Solids)
Once your baby starts solid foods (typically around 4-6 months), their poop will undergo another significant transformation. It will become firmer, more varied in color (reflecting what they've eaten), and smell more distinctly like adult stool. Undigested food particles (like corn kernels or bits of carrot) are also common and normal, indicating that their digestive system is still maturing.
When to Call the Doctor: Red Flags in Baby Poop
While baby poop can vary widely, certain characteristics warrant immediate attention from your pediatrician. These can be indicators of underlying health issues:
- White or Chalky Poop: This is a rare but serious sign. Very pale or white stool can indicate a blockage in the bile ducts or a liver issue, preventing bile from reaching the intestines. Seek medical attention immediately.
- Red or Bloody Poop:
- Bright Red Streaks: Often caused by a small anal fissure (a tiny tear in the skin around the anus) due to passing a hard stool. While common, it's worth checking with your doctor. More concerning are streaks of blood or mucous, which can indicate a cow's milk protein allergy, an infection, or other gastrointestinal irritation.
- Dark Red/Black (after Day 5): If your baby is older than 5 days and passes dark red or black, tarry stools (not meconium), this can indicate old blood from higher up in the digestive tract. This is a medical emergency.
- Mucous in Poop: Poop that looks snot-like or slimy, sometimes with streaks, can be a sign of infection (bacterial or viral), allergies (e.g., to dairy in the mother's diet for breastfed babies, or to formula ingredients), or even just increased saliva from teething. Persistent mucous warrants a call to the pediatrician.
- Hard, Pellet-like Stool: This indicates constipation. While frequency can vary, stool should always be soft. If your baby is straining excessively, crying, or passing hard, dry pellets, consult your doctor. They may recommend dietary changes (for older babies) or suggest a stool softener.
- Explosive, Watery Diarrhea: While breastfed poop can be runny, persistent, explosive, and watery stools in large volumes can indicate diarrhea, which carries a risk of dehydration, especially in infants. If accompanied by fever, vomiting, or decreased wet diapers, seek medical attention.
Part 4: Preventing and Treating Diaper Rash – Keeping Skin Healthy
Diaper rash is one of the most common skin conditions in infancy, affecting nearly every baby at some point. It presents as distinct red, inflamed, and often tender skin in the diaper area. Understanding its causes and implementing effective prevention and treatment strategies is crucial for your baby's comfort and skin health.
Understanding Diaper Rash: The Science Behind the Redness
Diaper rash isn't just one condition; it's a general term for irritation caused by several factors:
- Moisture: Prolonged exposure to urine and feces softens the skin, breaking down its natural barrier function. Urine elevates the skin's pH, making it more susceptible to irritation.
- Friction: The rubbing of the diaper against tender skin, especially when wet, can cause chafing and irritation.
- Chemical Irritants: Components of urine and feces, particularly digestive enzymes in poop, can break down skin proteins and cause inflammation. Chemicals in wipes (alcohol, fragrance) or certain diaper materials can also trigger reactions.
- Infection: The warm, moist environment of a soiled diaper is an ideal breeding ground for bacteria and yeast (Candida albicans). Often, a primary irritant rash can evolve into a yeast infection, especially if it's persistent or widespread.
Prevention: Your Best Defense Against Diaper Rash
Proactive measures are the most effective way to keep your baby's bottom happy and healthy.
- Frequent Diaper Changes: This is the cornerstone of prevention. Don't let your baby sit in a wet or soiled diaper for long periods. For newborns, this might mean changing every 1-3 hours, or immediately after a bowel movement. The less contact urine and feces have with the skin, the lower the risk of irritation.
- Embrace "Air Time": Whenever possible, let your baby go "commando" for 10-15 minutes a day, especially after a bath or during a diaper change. Lay them on a clean towel or waterproof pad on a warm surface. Exposure to air promotes healing, reduces moisture, and allows oxygen to reach the skin, which is vital for skin health.
- Utilize a Barrier Cream: For babies prone to rashes or with sensitive skin, applying a protective barrier cream with every diaper change can be highly effective. Look for creams containing zinc oxide (often 10-40%) or petroleum jelly (like Vaseline). These create a physical barrier that shields the skin from moisture and irritants.
- Gentle Wipes and Cleaning: Choose wipes that are alcohol-free, fragrance-free, and hypoallergenic. WaterWipes, as previously mentioned, are an excellent example. For very sensitive skin or during a rash, warm water and soft cloths or cotton balls are often the gentlest option. Always wipe gently, without rubbing aggressively.
- Proper Diaper Fit: A diaper that is too tight can cause friction and chafing, while one that is too loose can lead to leaks and increased moisture exposure. Ensure the diaper fits snugly around the waist and legs but allows for comfortable movement.
Treatment: When Diaper Rash Strikes
If a rash appears despite your best efforts, prompt and aggressive treatment is key to quick recovery.
- Gentle Cleaning is Paramount: Stop using commercial wipes, as the chemicals and friction can sting and exacerbate the rash. Instead, use a soft cloth or paper towel moistened with warm water. Gently dab the area clean, avoiding any rubbing.
- Slather on the Cream – "Frost the Cupcake": Apply a very thick layer of a maximum-strength zinc oxide cream (ideally 20-40% zinc oxide). Don't rub it in; instead, gently "frost" the entire affected area, creating a visible, protective layer. This creates an impenetrable barrier against further irritation.

Triple Paste Diaper Rash Cream for Baby - 16 Oz Tub – Zinc Oxide Ointment Treats, Soothes & Prevents Diaper Rash, Pediatrician-Recommended Hypoallergenic Formula, Baby Essentials for Daily & Overnight
Gentle yet effective baby skin care formula: The Triple Paste diaper cream formula leverages the healing properties of 12.8% non-nano zinc oxide and combines them with oat extract, beeswax and more to immediately soothe and treat irritated skin Gentle yet effective baby skin care formula: The Triple Paste diaper cream formula leverages the healing properties of 12.8% non-nano zinc oxide and combines them with oat extract, beeswax and more to immediately soothe and treat irritated skin Medicated diaper rash ointment: Triple Paste is the pediatrician-recommended zinc oxide cream with an all-in-one triple action formula that treats mild to severe rashes, immediately soothes baby’s bum and prevents future diaper rashes Triple Paste baby diaper cream, is celebrated by parents who simply want the best for their baby’s delicate skin; store in your baby's diaper bag for on-the-go ease with baby care products; packaging may vary Better for baby: The diaper ointment is free from fragrance, alcohol, talc, dyes, parabens, phthalates and preservatives; a baby diaper rash cream that is gentle enough for daily use and safe for even the most sensitive skin
Triple Paste Diaper Rash Cream is a pediatrician-recommended, highly effective choice known for its thick consistency and blend of zinc oxide, oat extract, and beeswax. It provides long-lasting relief and protection, even for severe rashes.
3. Baking Soda Bath: For particularly irritated skin, a shallow bath with 2 tablespoons of baking soda dissolved in the water can be incredibly soothing. Baking soda helps to neutralize the acid from urine and feces that irritates the skin. Allow your baby to soak for 10-15 minutes, then pat dry thoroughly. 4. Re-evaluate Diaper Fit: Ensure the diaper isn't too tight, especially if the rash is along the edges of the diaper or in folds. Sometimes, sizing up can alleviate friction and promote healing. 5. Increase Air Time: Maximize naked time to allow the skin to heal and breathe.
Expert Tip: Recognizing and Treating Yeast Diaper Rash
Not all rashes respond to standard diaper creams. If a rash is bright red, shiny, has sharply defined borders, and features "satellite lesions" (small red spots or bumps spreading out from the main rash), it is likely a yeast (fungal) infection. Yeast rashes typically occur in the skin folds and will often worsen with standard zinc oxide creams. If you suspect a yeast rash, see your pediatrician. They will likely prescribe an antifungal cream (like Nystatin) that will clear it up quickly. Persistent rashes that don't improve with 2-3 days of aggressive treatment should always be evaluated by a medical professional.
When to Call the Doctor for Diaper Rash:
- The rash doesn't improve or worsens after 2-3 days of consistent treatment.
- The rash is accompanied by a fever.
- The rash develops blisters, boils, or open sores.
- The rash looks like a yeast infection (bright red, satellite lesions) and isn't responding to barrier creams.
- Your baby seems to be in significant pain or discomfort.
Conclusion: Beyond the Changing Table
Diapering is a repetitive, sometimes messy, but profoundly essential act of care in the early years of your child's life. It's more than just hygiene; it's an opportunity for connection, for learning your baby's cues, and for providing comfort and security. Each diaper change offers a chance for eye contact, a gentle touch, a sweet song, or a playful tickle – small moments that build the foundation of your relationship.
You are now equipped with the knowledge of cloth versus disposable, the precise steps for a hygienic change, the wisdom to interpret your baby's bowel movements, and the strategies to prevent and treat diaper rash. Embrace this journey with confidence, knowing that you are providing the best care for your little one. Before you know it, you'll be celebrating milestones like potty training and saying goodbye to the changing table forever. Until then, keep those gentle wipes handy, your barrier cream at the ready, and cherish every single moment of this incredible parenting adventure. You've got this!